

1. Sign up
Go to app.abtestly.com and create an account. Creating an experiment needs an active plan, so pick monthly Starter, Pro or Business and take the 14 day trial. It is the full plan at your own traffic, not a reduced version. A card is required when you start the trial and the first charge lands on day 15, so cancel before then and you pay nothing. Prices, MTU caps, and quotas for each tier live on the plans page.2. Connect your site
After signup you land on the Sites screen. Click Add site and type your domain,example.com, without https:// or a trailing slash.
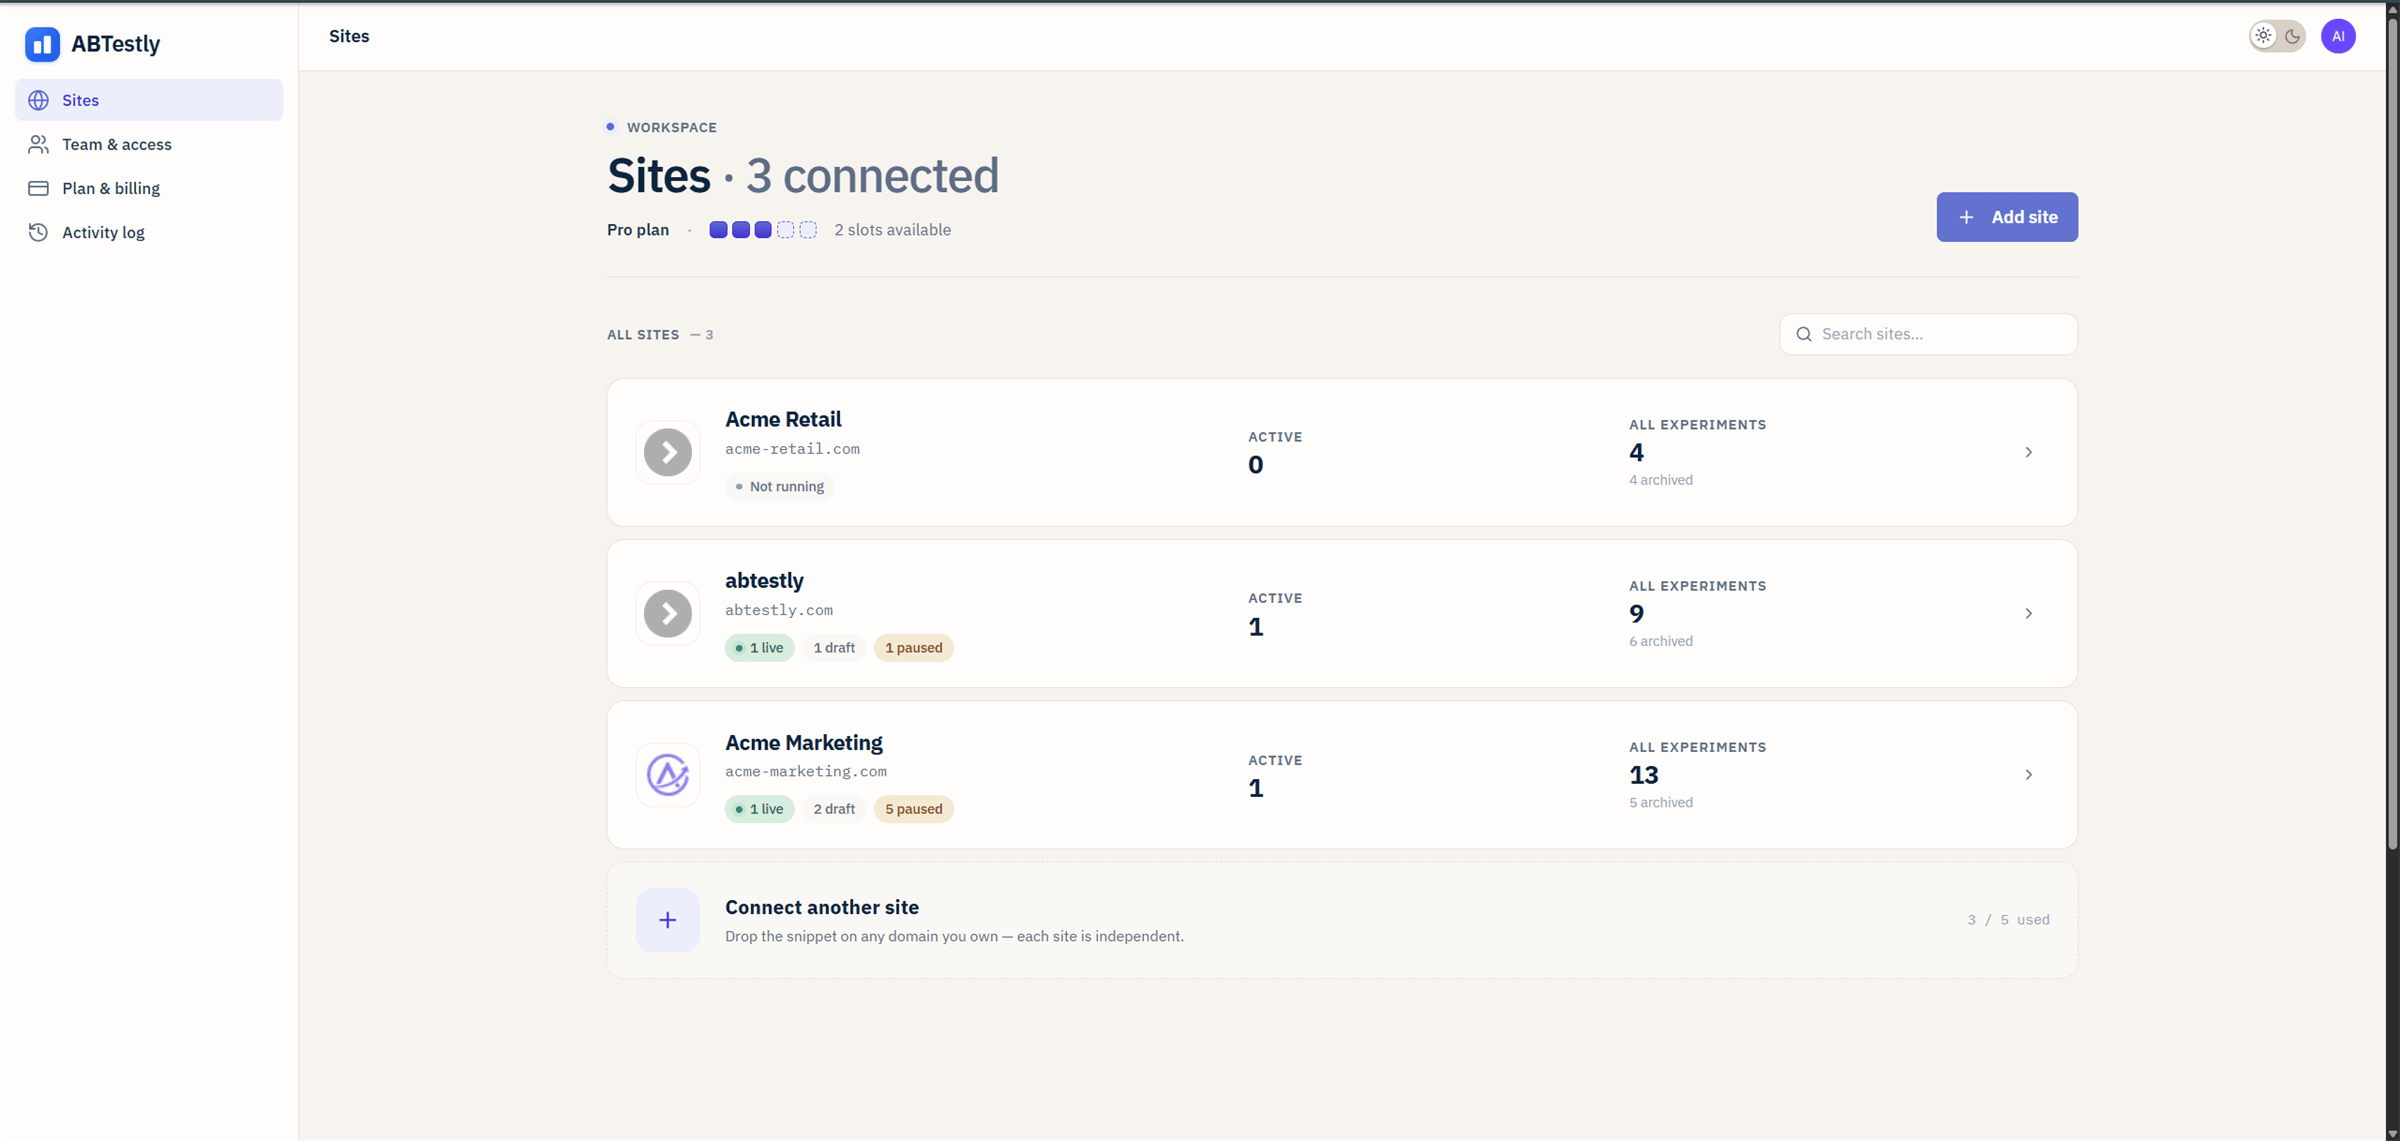
Sites screen. Each site is independent and gets its own snippet.
3. Install the snippet
On the site you just added, open Settings → Snippet. Copy the snippet. Paste it into the<head> of every page you want to test, as the first
script tag, before any other JavaScript.
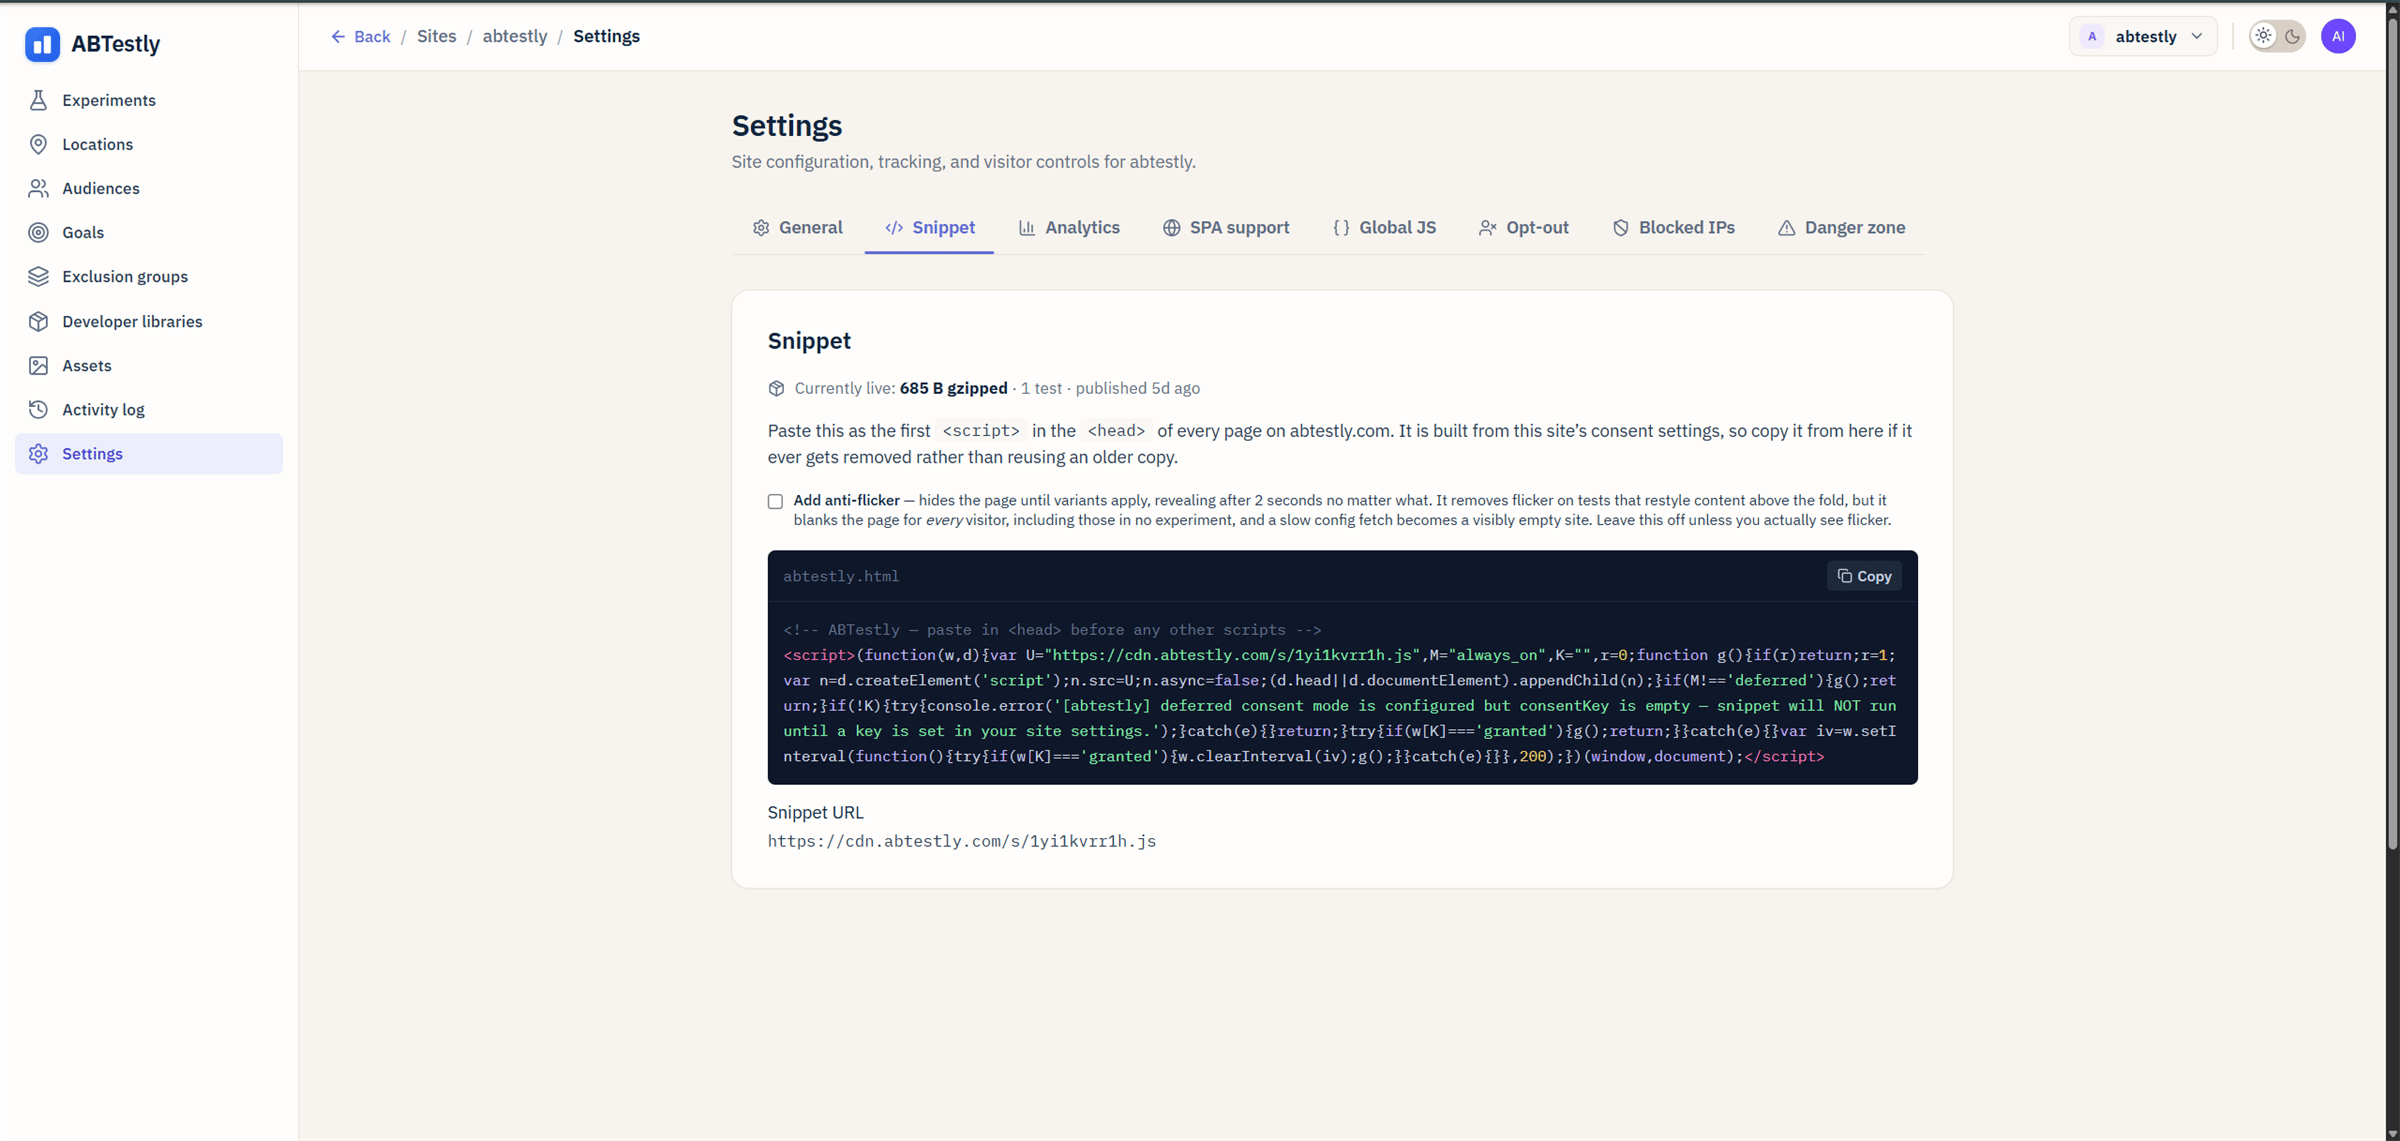
The Snippet panel. Copy from here, the snippet is built from your consent settings.
4. Verify
Load your site in a fresh tab. Open DevTools (F12) and, in the Console, type:undefined, the snippet did not load. The
verify install page has the checklist.
5. Build the test
In the dashboard, open your site and click New experiment. The editor is one screen with a checklist down the left. You do not have to fill every section, leave anything you do not care about at its default and it stays green.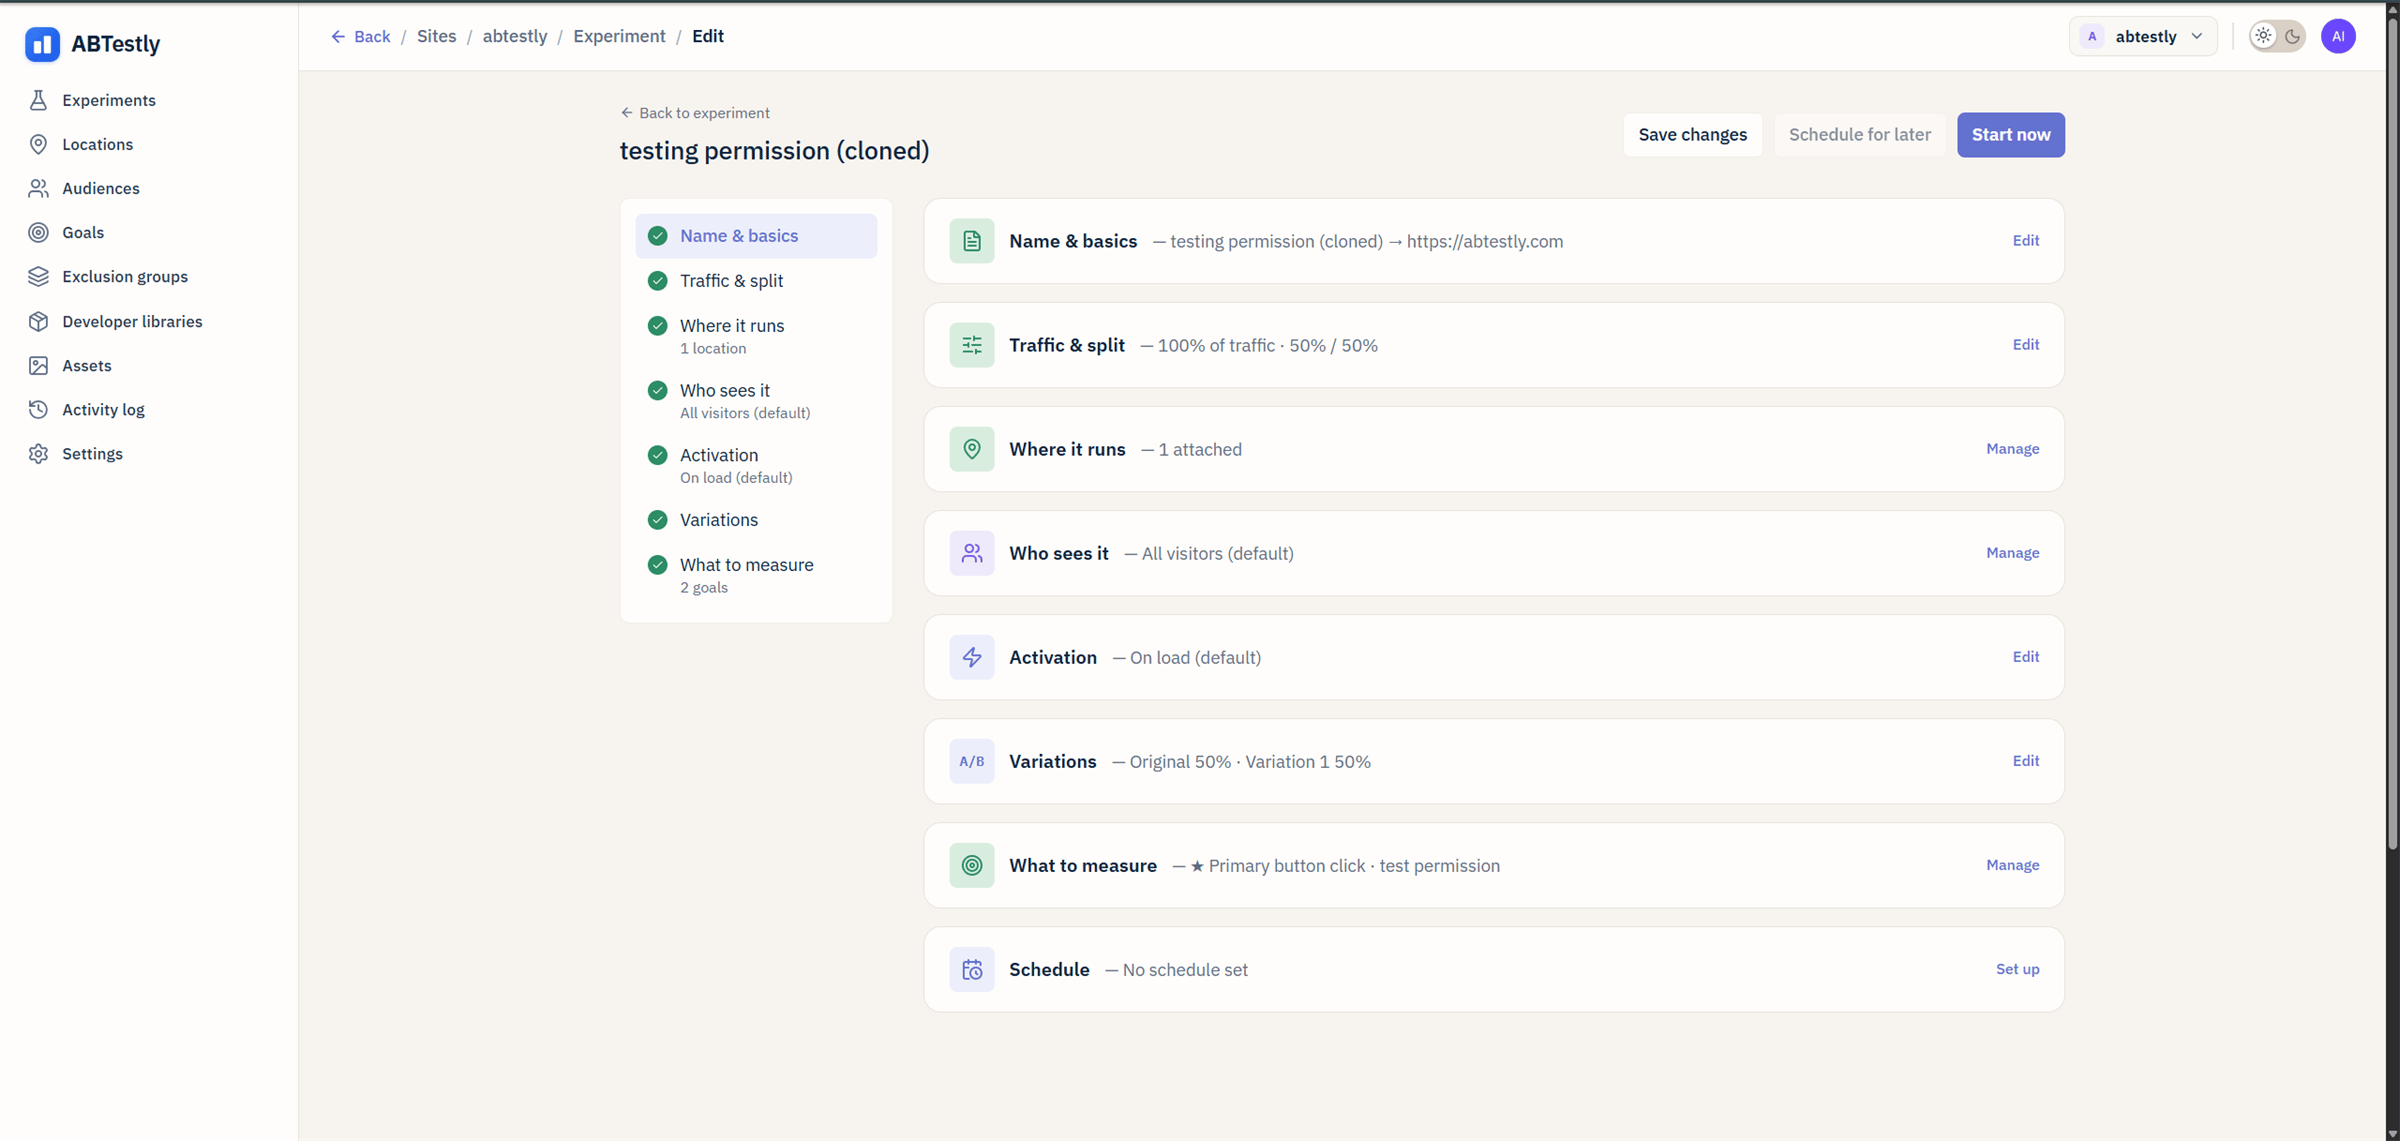
The experiment editor. Sections light up green as you fill them in.
1
Name and basics
Give the test a name and the URL you want to test on, and pick the
test type: an A/B test whose variations change the page with
JS and CSS, or a Split URL test whose variations send visitors to
another page. The type is fixed once the test is created.
2
Traffic and split
How much of matching traffic enters the test, and how the entered
traffic splits between variants. Defaults to 100% in, 50/50 split.
3
Where it runs
URL rules that decide which pages count. Pick a saved
Location or write rules inline.
4
Who sees it
Audience rules. Country, device, source, cookie value, and a few dozen
more. Leave blank to include everyone.
5
Activation
When the test fires. Immediately on page load, on a click, when an
element is visible, or when your own code calls
abtestly.activate(). See
Activation triggers.6
Variations
The Original (control) and one or more variants. In an A/B test each
variant is a piece of JavaScript, CSS, or both, applied to matching
pages. In a Split URL test each variant carries a redirect URL
instead. See Redirect tests.
7
What to measure
One primary goal plus any guardrails. Two goals are attached automatically
(see System default goals); you can add your
own from the goal library.
8
Schedule
Optional. Start on a specific date, stop on a date, cap the run length,
or leave blank and run until you say Stop.
6. Start it
Click Start now at the top-right of the editor, or Schedule for later if you want it to go live at a specific time. The new config reaches every Cloudflare edge location within about sixty seconds. Visitors get bucketed from the first request after that.7. Watch the results
Open the experiment and click View results. The page tells you what it knows so far, visitors in, conversions, confidence, and a verdict written in plain English.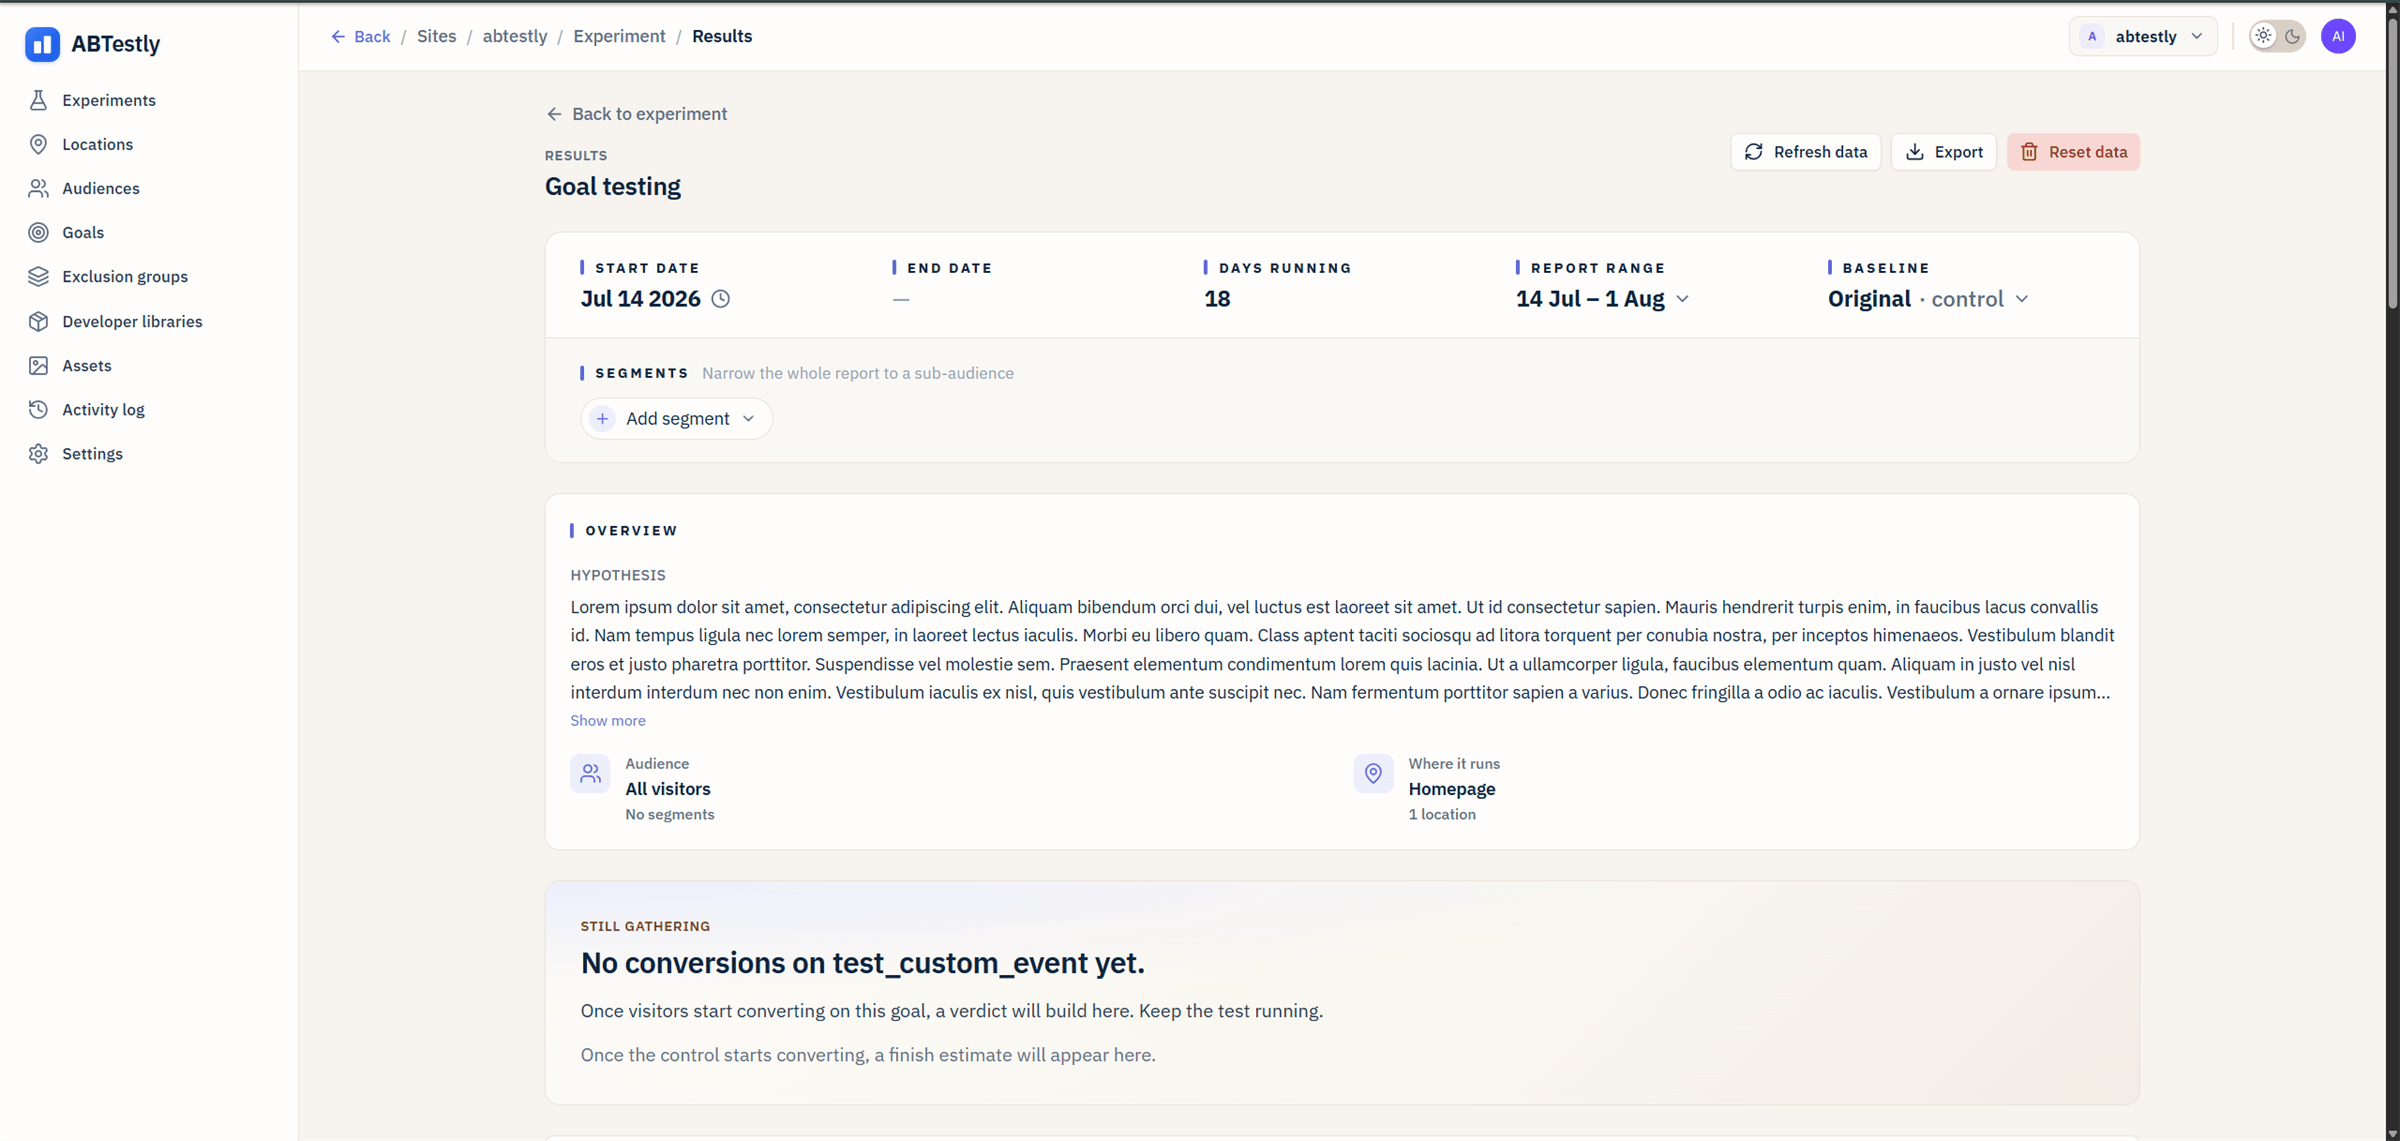
Results page while a test is still gathering.
Next
How ABTestly works
The whole system on one page, if you want the shape before the details.
Snippet install reference
CMS-specific notes, consent modes, and the anti-flicker tradeoff.
Targeting overview
Locations, audiences, activation triggers, exclusion groups.
Read results
Three statistics engines, honest verdict copy, real segments.